About this deal
For this reason, before interfacing the PZEM-004T V3.0 module with Arduino, we recommend that you first test the function of the PZEM-004T V3.0 module to ensure that the PZEM-004T V3.0 module is not damaged or functioning properly. It is recommended to use GPIO1/GPIO3 or GPIO13/GPIO15 for the most reliable serial communications. When using other GPIOs software serial will be activated and used. GPIO It should be noted that the protocols used in PZEM-004T V2.0 and PZEM-004T V3.0 are different, so the library and programming are also different. Many people think that the PZEM-004T module is corrupt or doesn’t work just because they don’t know and are using the wrong library. Malaus schau mal ob die Dioden richtig verschalten sind, eventuell mal die Dioden drehen, bei mir waren die Dioden falsch markiert. Mit der Software kann übrigens das Gerät auf Funktion überprüft und auch Kalibriert werden, wenn nötig!
Pzem 004T Murah - Harga Terbaru Oktober 2023 - Tokopedia Jual Pzem 004T Murah - Harga Terbaru Oktober 2023 - Tokopedia
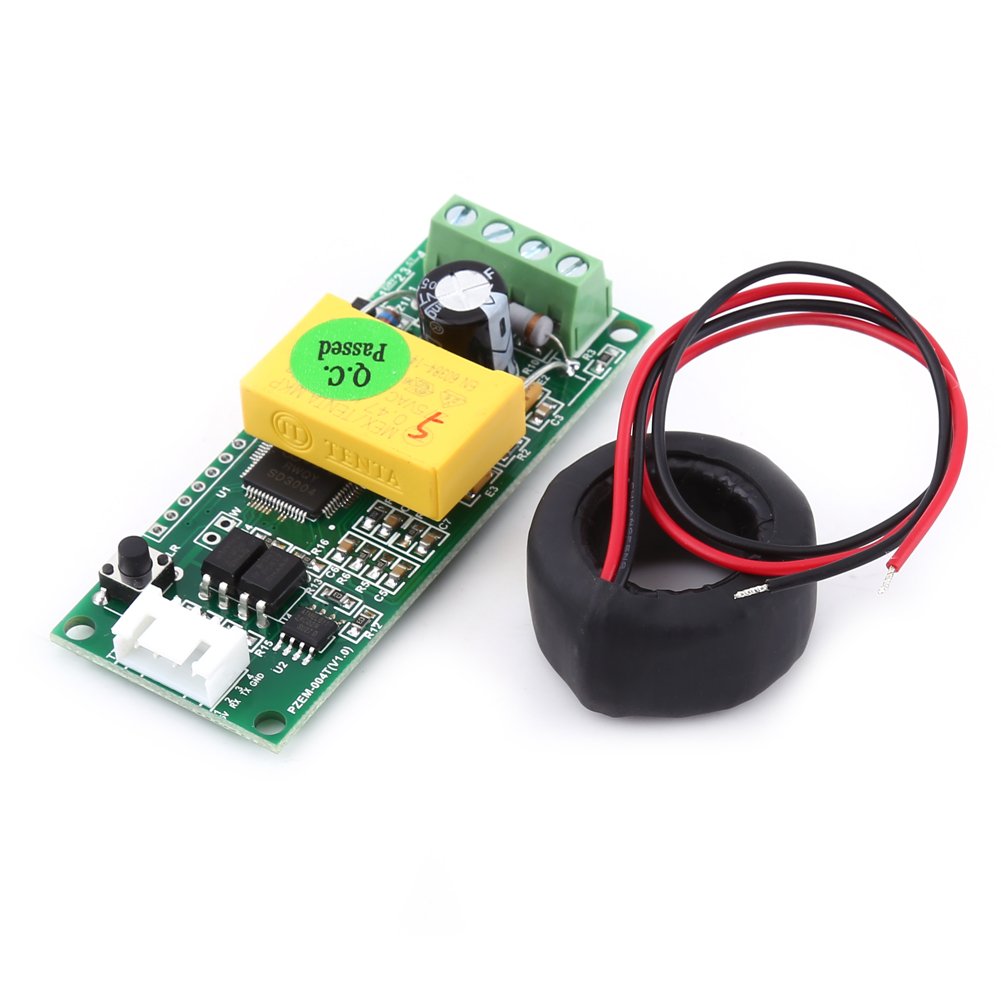
The Version 3.0 PZEM is an upgraded version of the older PZEM-004T for which you can find the library Here Main features The microcontroller reads electrical parameters (e.g., voltage, current, power) from the PZEM sensor at regular intervals. The Peacefair PZEM-004T features a built-in button on the panel, used to make the electricity clear function. Precautions: I have negative peaks in Watt’s … not sure why the sensor would give such big negative values (around -2500W a dozen of times a day (not night when all is quite). I think it happens when there is a higher load. Alles nach folgendem Schaltplan verschalten (Pzem-004t Module müssen mit 5V Spannung versorgt werden, nicht sichtbar auf dem Schaltplan).putX: These methods store values of various data types (e.g., putInt, putFloat, putString) in the preferences identified by a key (name). For example, putInt("someKey", 42) stores the integer value 42 with the key "someKey". NAME":"HW-655 PZEM","GPIO":[0,62,0,63,0,0,0,0,0,0,0,0,0],"FLAG":0,"BASE":18} PZEM-004T version V3 ~ Die Dioden habe ich im Tx Strang verbaut. Nur die zusätzliche Versorgung hab ich nicht drin. Es funktioniert auch ohne. Ist die einfach nur zur Unterstützung des Bus da? include
PZEM-004T V3 V3.0 Interfacing Program Using Example of the PZEM-004T V3 V3.0 Interfacing Program Using
Cannot running on Windows 10 64bit. Even when i set its compatibility with any Windows options. Also even when i… My intention is to send requests to the PZEM via the Adapter board. I had attempted by connecting the RX-TX cables in both ways (cross: RX to TX and vice versa, or ther direct, RX-RX and TX-TX). I also tried using both the 5V and 3V options to power the PZEM from the USB-TTL adapter (5V and 3.3V). Ich habe die Variante mit den Tasmota Befehl selber noch nicht getestet, weil mit dem Herstellertool kann man super auch kontrollieren, ob die Adressierung stimmt. Install Tasmota on the Sonoff Basic and confirm it is functional before connecting the PZEM-004T to its serial interface. Hardware connections ~The TX pin of the PZEM-004T should be connected to the RX pin of the Bharath Pi board, and the RX pin of the PZEM-004T should be connected to the TX pin of the Bharath Pi board. This is because the PZEM-004T uses serial communication, and the communication direction is from the PZEM sensor to the Bharath Pi board.
 Great Deal